
How to Install Shock Therapy Can-Am X3 DS Limit Straps

How to Install Shock Therapy Can-Am X3 DS Limit Straps
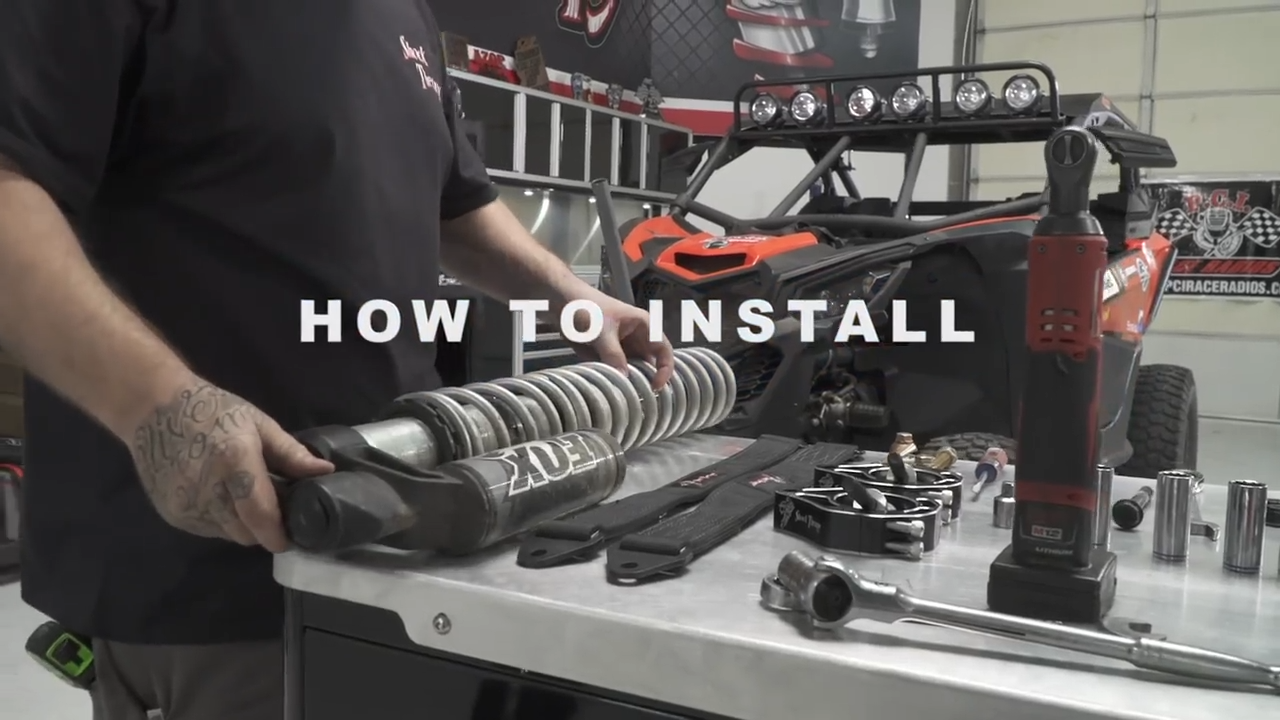
Finally, there’s a cure for the front end clunk sound from the Can-Am X3... Shock Therapy Limit Strap Kits! As most people know, the shocks can make a loud clunk that feels like a hammer against the chassis at full extension. If you run aftermarket, heavier wheels, and tires, this clunk gets much worse. Although the shocks have extension stops internally, the tuning is by the factory wheel and tire weight. They can't manage changes in the system. Due to this setup, a front end clunk has become the new normal in UTV's. Well, not anymore. Shock Therapy’s new limit strap kit stops the front end clunk instantly.
Some of the components in the kit are:
- 2x Billet Aluminum Upper Clevis Limit strap mounts
- 2x Adjustable Clevises
- 12-millimeter Hardware including Nuts Washers and Spacers
- 2x Limit straps with adjustable Teathers

Steve Feick, a Shock Therapy suspension technician, explains how to install a front limit strap kit on a Cam-Am X3.
Complete the installation at home using the following steps.
Jack Up the Car
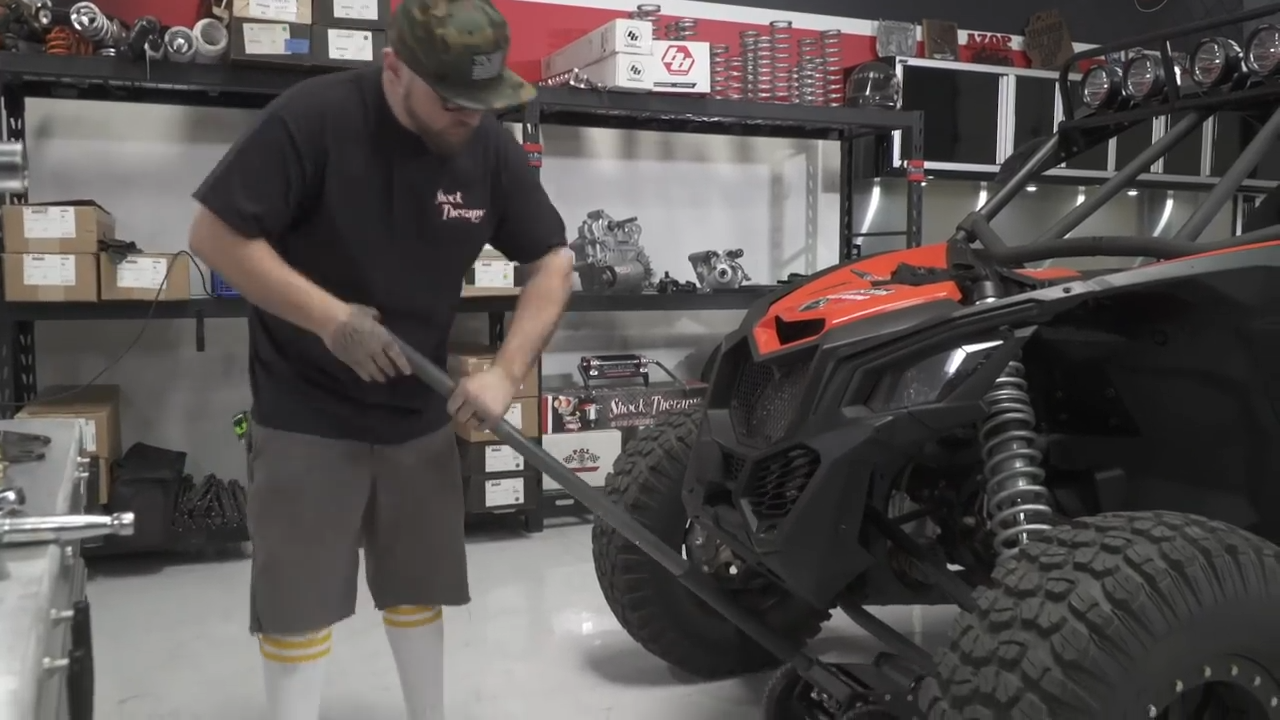
Jack the car up to where the tires are about an inch off the ground.
Loosen the Hardware
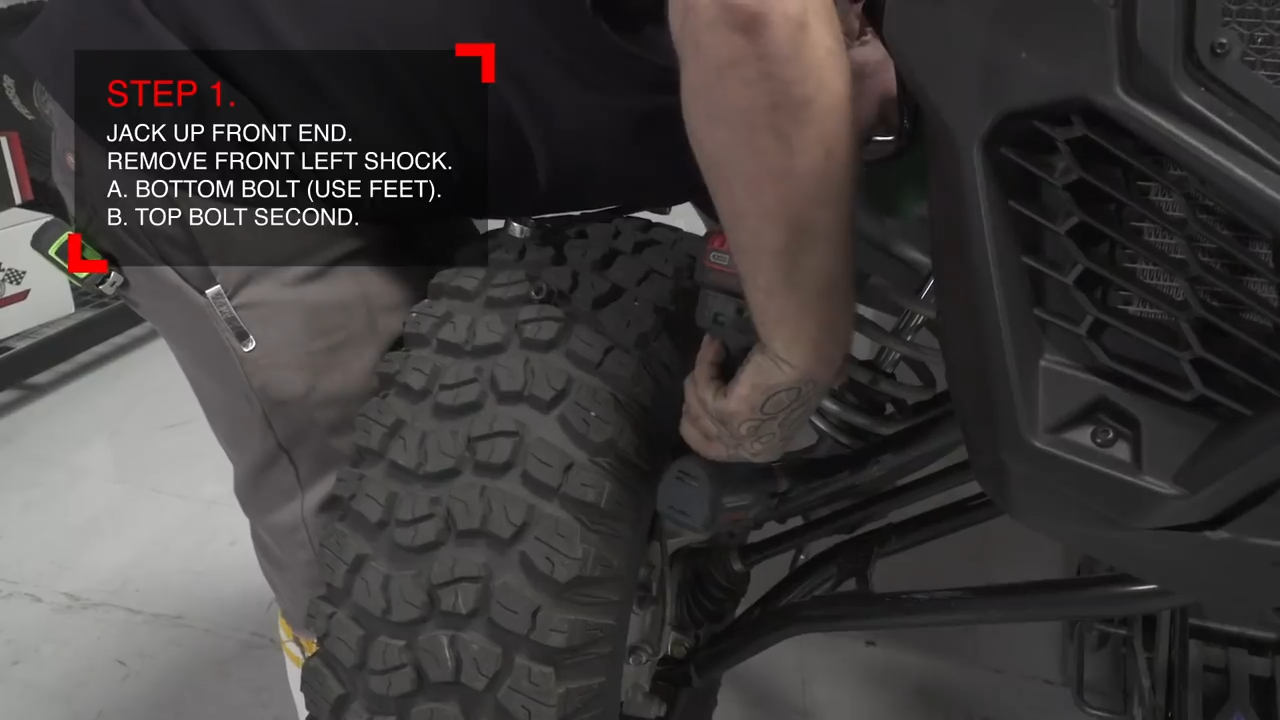
Start by first loosening the lower hardware and then the upper hardware. Remember to save the stock hardware as some of the stock nuts will be reused in the limit strap kit.
Remove Shock

Remove the shock from the car.
Clock Clamp
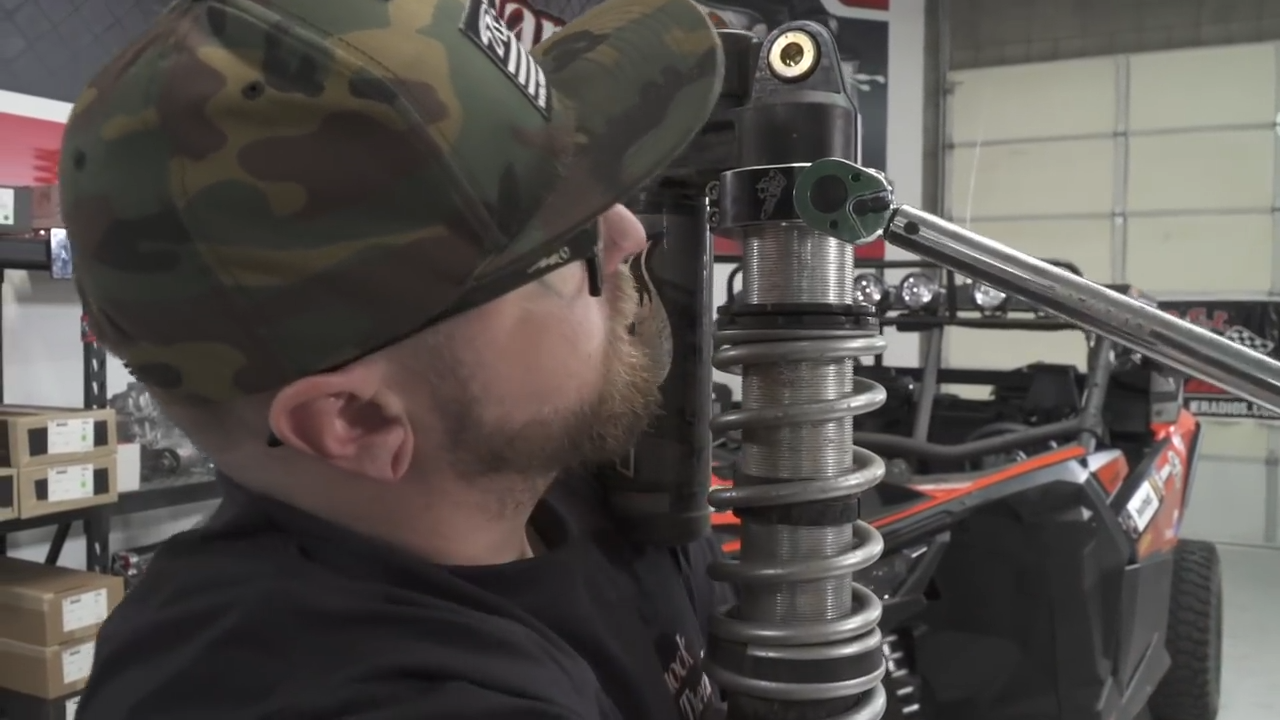
Install the billet aluminum limit strap clamp on the shock head. Clock the limit strap clamp so that the mounting hole for the adjustable clevis is forward-facing and aligned with the upper bolt hole for the shock mount position. When tightening the limit strap clamp, ensure it is lifted as high as possible on the shock body. It should touch the shock blackhead.
Attach clevis to strap
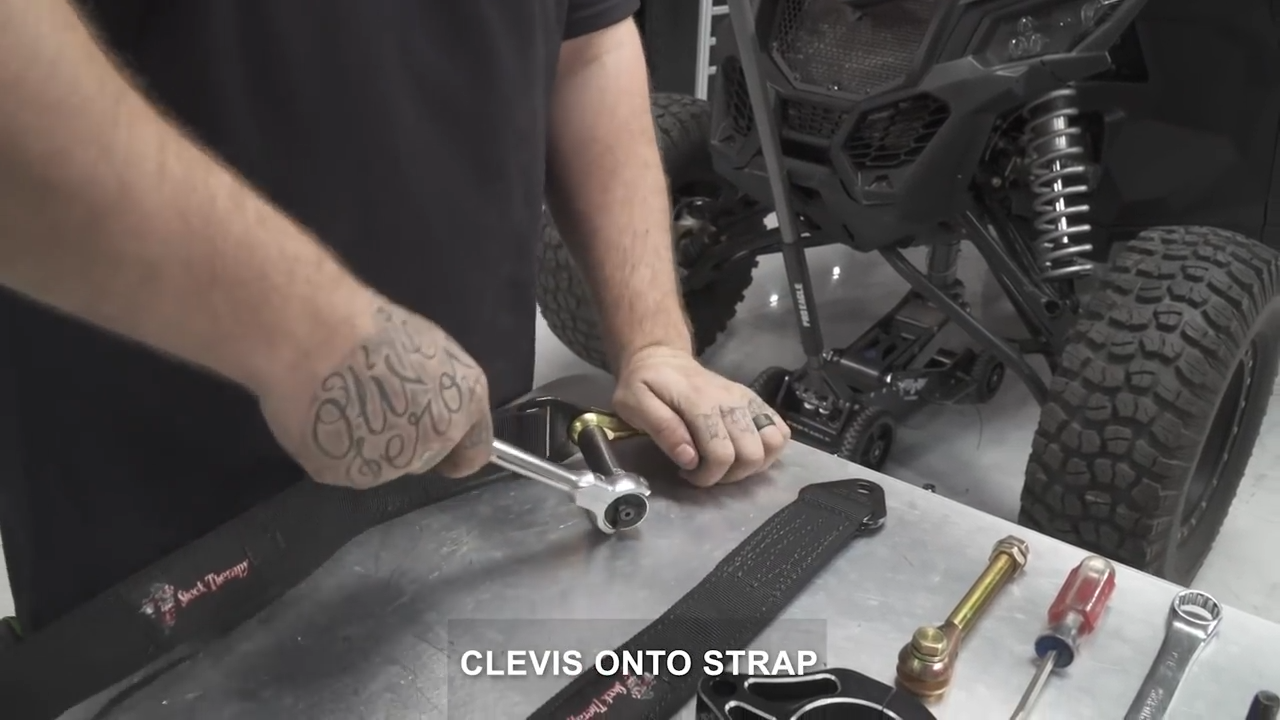
Begin installing the strap by locating the larger hole in the strap. The top of the strap has the larger hole, and after tightening the clevis bolt, it will be installed onto the clevis. Make sure the strap is able to move within the clevis.
Install Clevis to billet Clamp
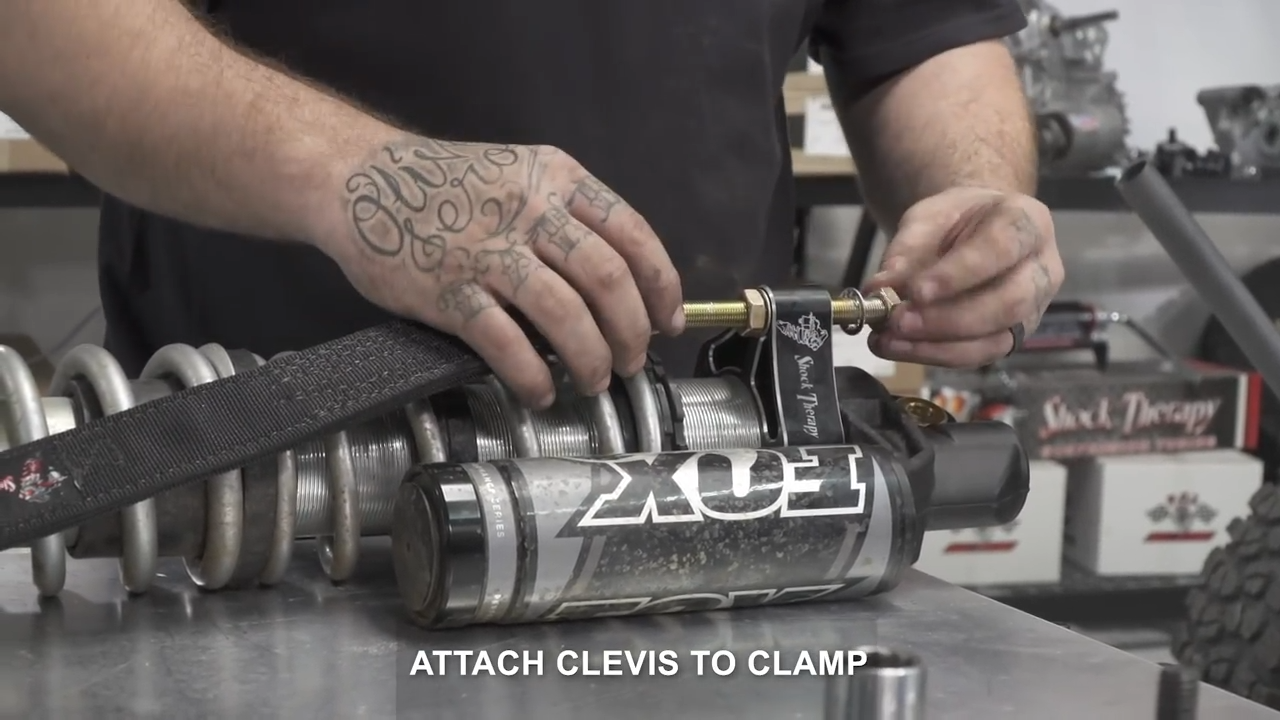
Install the clevis on the billet aluminum clamp using star washers on both sides of the billet aluminum clamp.
Set Strap Length

A good starting point for strap measurement is to set the strap up one-and-a-half inches shorter than the shock. It is measured from the lower hole up to the lower strap hole.
Tighten Clevis
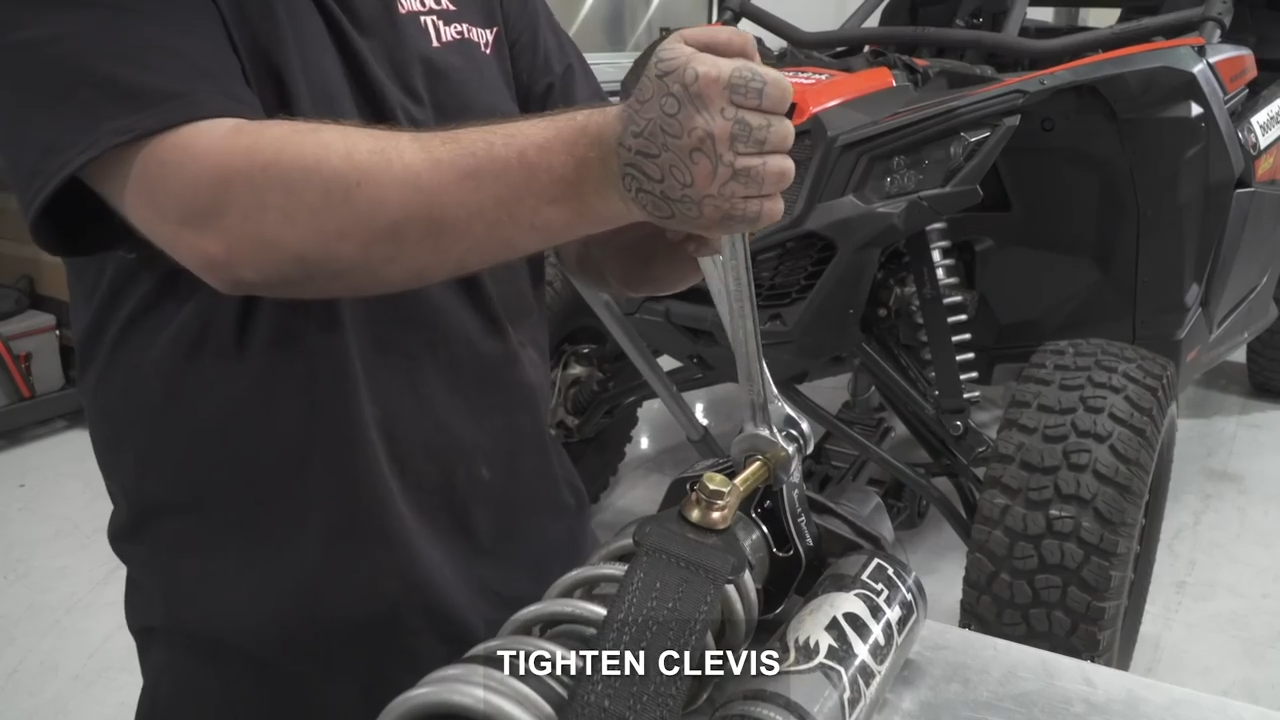
Tighten the clevis to the billet aluminum clamp. Ensure that the clevis is perfectly straight with the spring so that the strap is in line with the spring assembly. Remove the strap from the clevis for the installation of the shock.
Install Shock

With the clamp install on the shock, Install the shock back on the car. Start with the upper stock hardware. Grab the hardware supplied in the kit for the lower bolt before installing the strap on the car. Install the lower bolt on the bottom with the stainless steel washer, then install the stainless steel spacer onto the bolt.
Install Strap
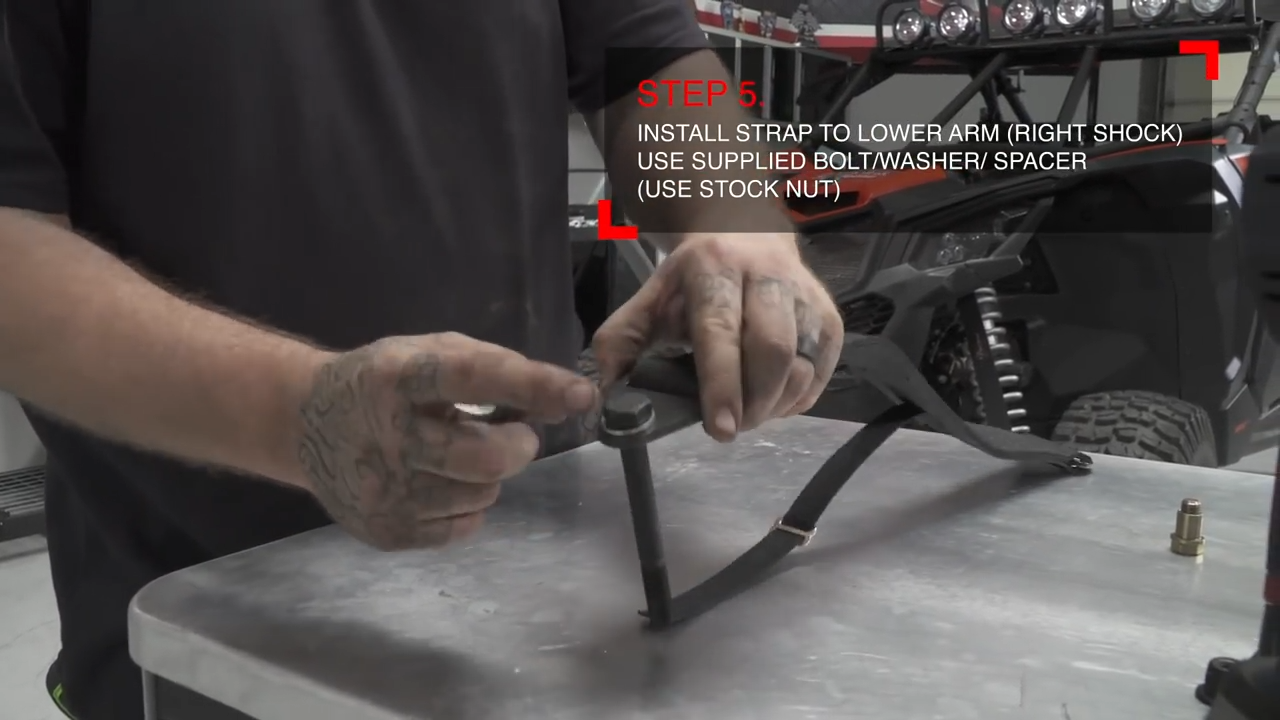
Before installing the strap on the car, grab the hardware supplied in the kit for the lower bolt. Install the lower bolt on the bottom with the stainless steel washer, then install the stainless steel spacer onto the bolt.
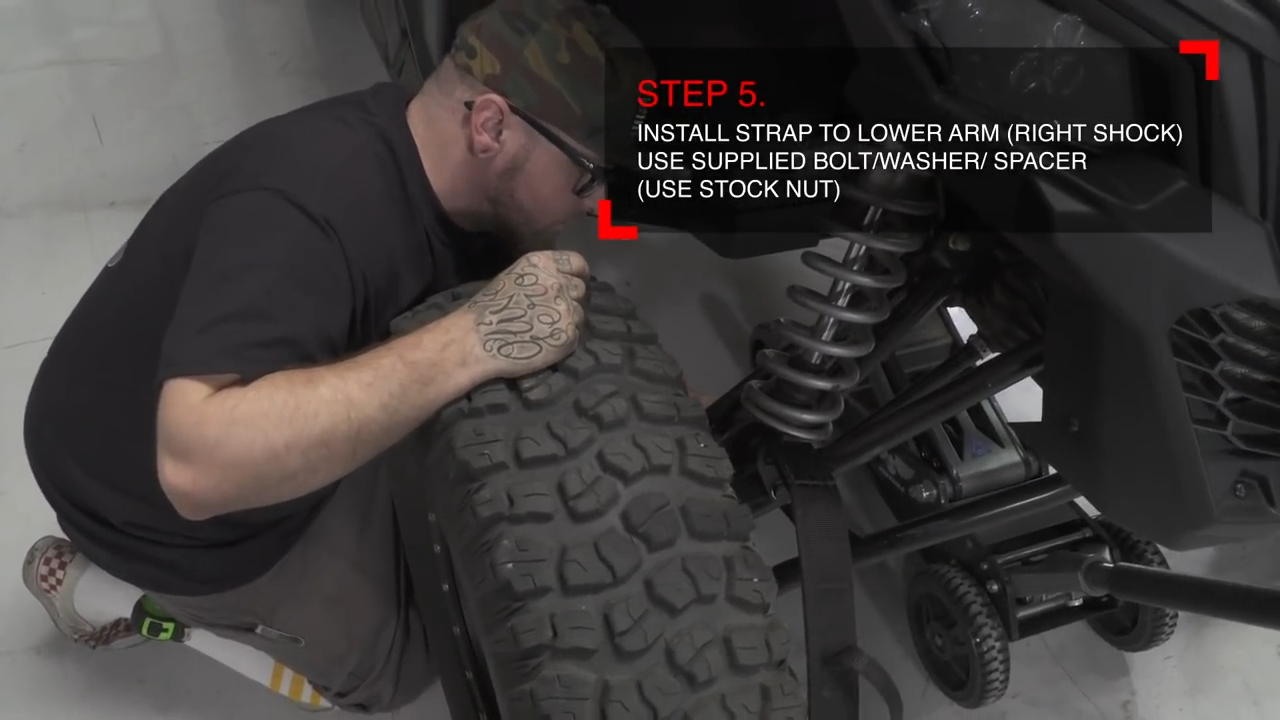
Install the bottom of the strap first, then slide through the shock the supplied bolt and stainless steel spacer through the control arm and install the factory nut on the bolt back.
Settle the Suspension
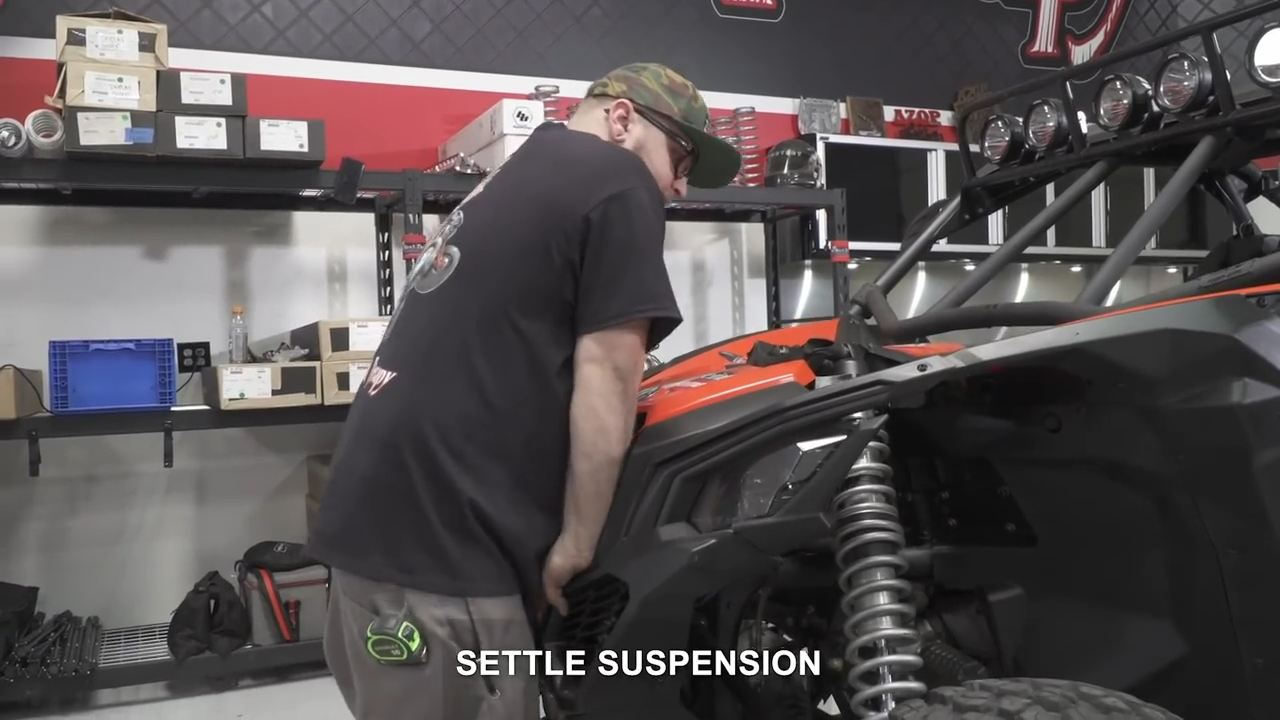
Lower the car back on the ground and push on the front bumper to compress the suspension. This will give enough space to install the adjustable clevis. Once the adjustable clevis is installed on the billet clamp, jack up the car off the ground again.
Tighten the Hardware

Tighten both the lower and upper Hardware, keeping the strap perfectly straight. Make sure to torque all the hardware to “95 FT-LBS”.
Attach Strap Tether

Lower the car back on the ground again. Settle the suspension and attach tethers to springs.
Repeat the same steps on the opposite side.


