
The Ultimate Guide: Mounting a Tire on a Beadlock Wheel

The Ultimate Guide: Mounting a Tire on a Beadlock Wheel for UTVs
Disclaimer: Keep in mind that there are multiple ways to mount beadlock wheels. This video presents our method. If you're not confident, it's best to seek professional assistance at a tire shop to ensure your safety.
Introduction:
When it comes to maintaining and modifying your UTV, mounting tires on beadlock wheels is an important task. Beadlock wheels offer enhanced tire retention capabilities, making them perfect for off-road adventures. However, this process can be intimidating for beginners. In this comprehensive guide, we will provide step-by-step instructions on how to mount a tire on a beadlock wheel for your UTV. Let's get started!
Tools and Materials Needed:
Before we begin, gather the following tools and materials:
- Beadlock wheel
- Tire
- Tire mounting lubricant (or soapy water)
- Valve stem and valve stem tool
- 5-gallon bucket
- Compressed air source (80-100 psi) with tire chuck and tire gauge
- Anti-seize
- Torque wrench
- Low-torque cordless impact driver or ratchet
- Socket for beadlock bolts
- Safety goggles
- Gloves
Step-by-Step Instructions:
Step 1: Preparing the Work Area

Wear safety glasses and ensure you have a clean, well-lit work area with enough space to maneuver the tire and wheel. Use a protective mat or sheet to prevent damage to the wheel or floor. While preparing, set the tires out in the sun for about 30 minutes to soften the rubber slightly, making them easier to work with.
Step 2: Inspecting the Wheel and Tire:
Before mounting or using any part, ensure that your wheel is the correct size and the bolt pattern matches your UTV. Inspect both the beadlock wheel and tire for any damage or manufacturing defects. Check for cracks, bends, excessive wear on the wheel, and punctures, bulges, as well as uneven tread wear on the tires.
Step 3: Applying Lubricants:
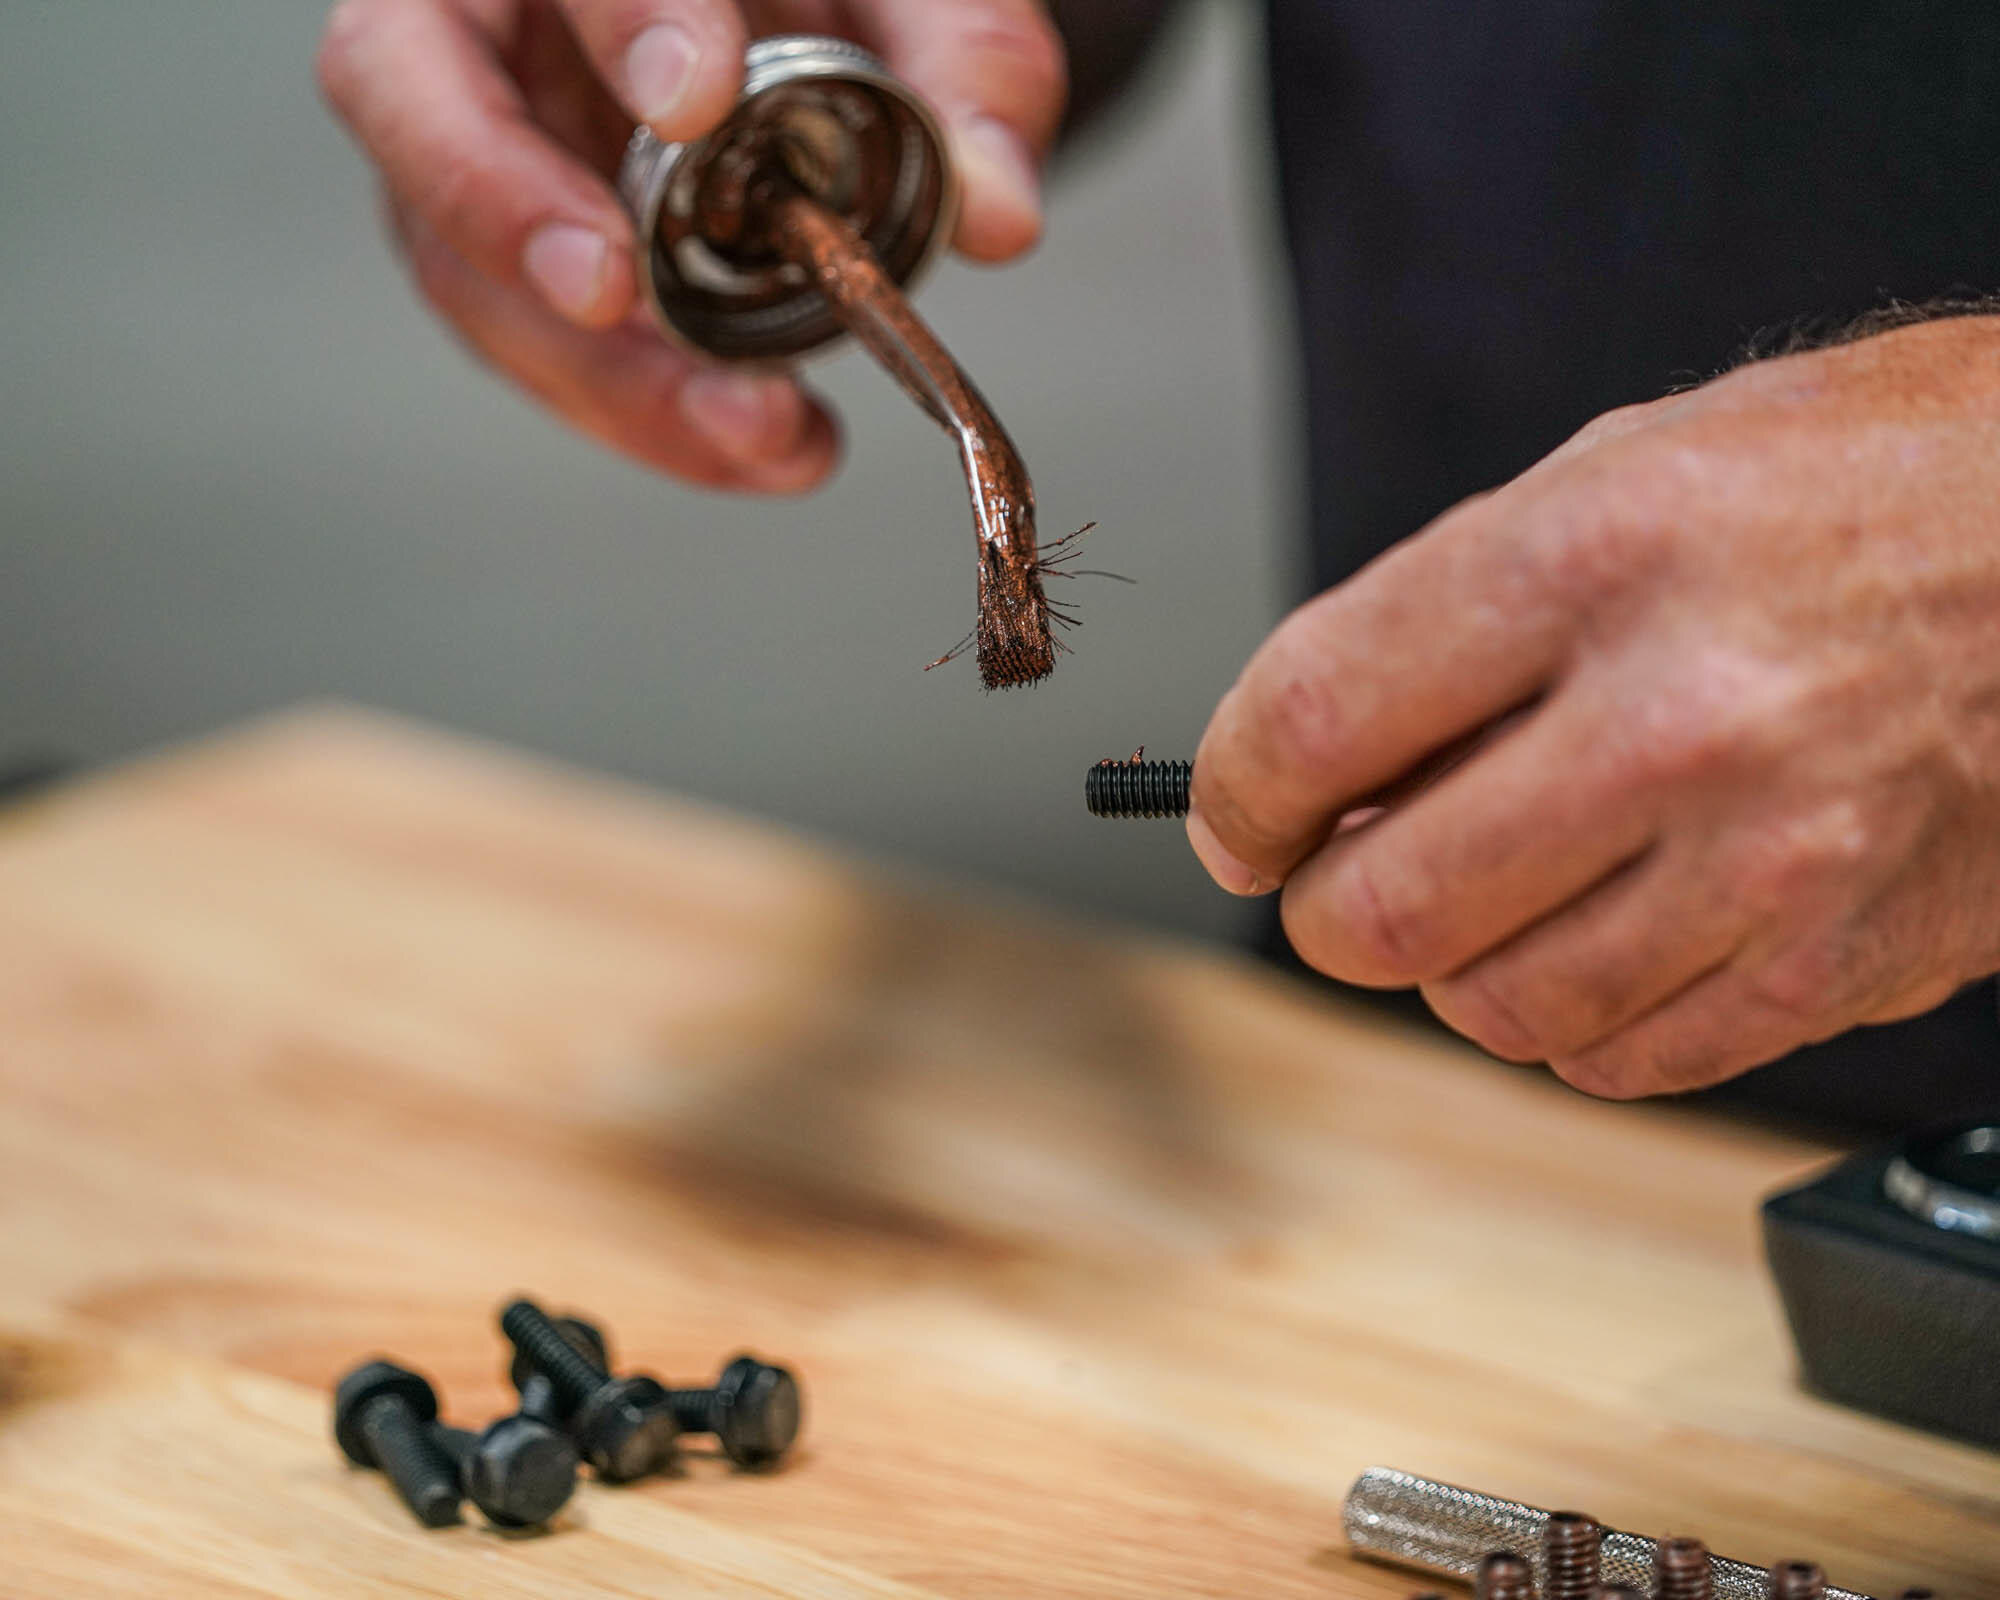
Apply anti-seize (we prefer bronze) or wheel bearing grease to all beadlock bolts to lubricate the threads and reduce friction while torquing them down. Apply a generous amount of tire mounting lubricant (or soapy water) to the side of the tire that will be mounted on the inside of the wheel. This lubrication will reduce friction during the mounting process and while setting the bead, making it easier to install the tire.
Step 4: Inserting the Valve Stem:
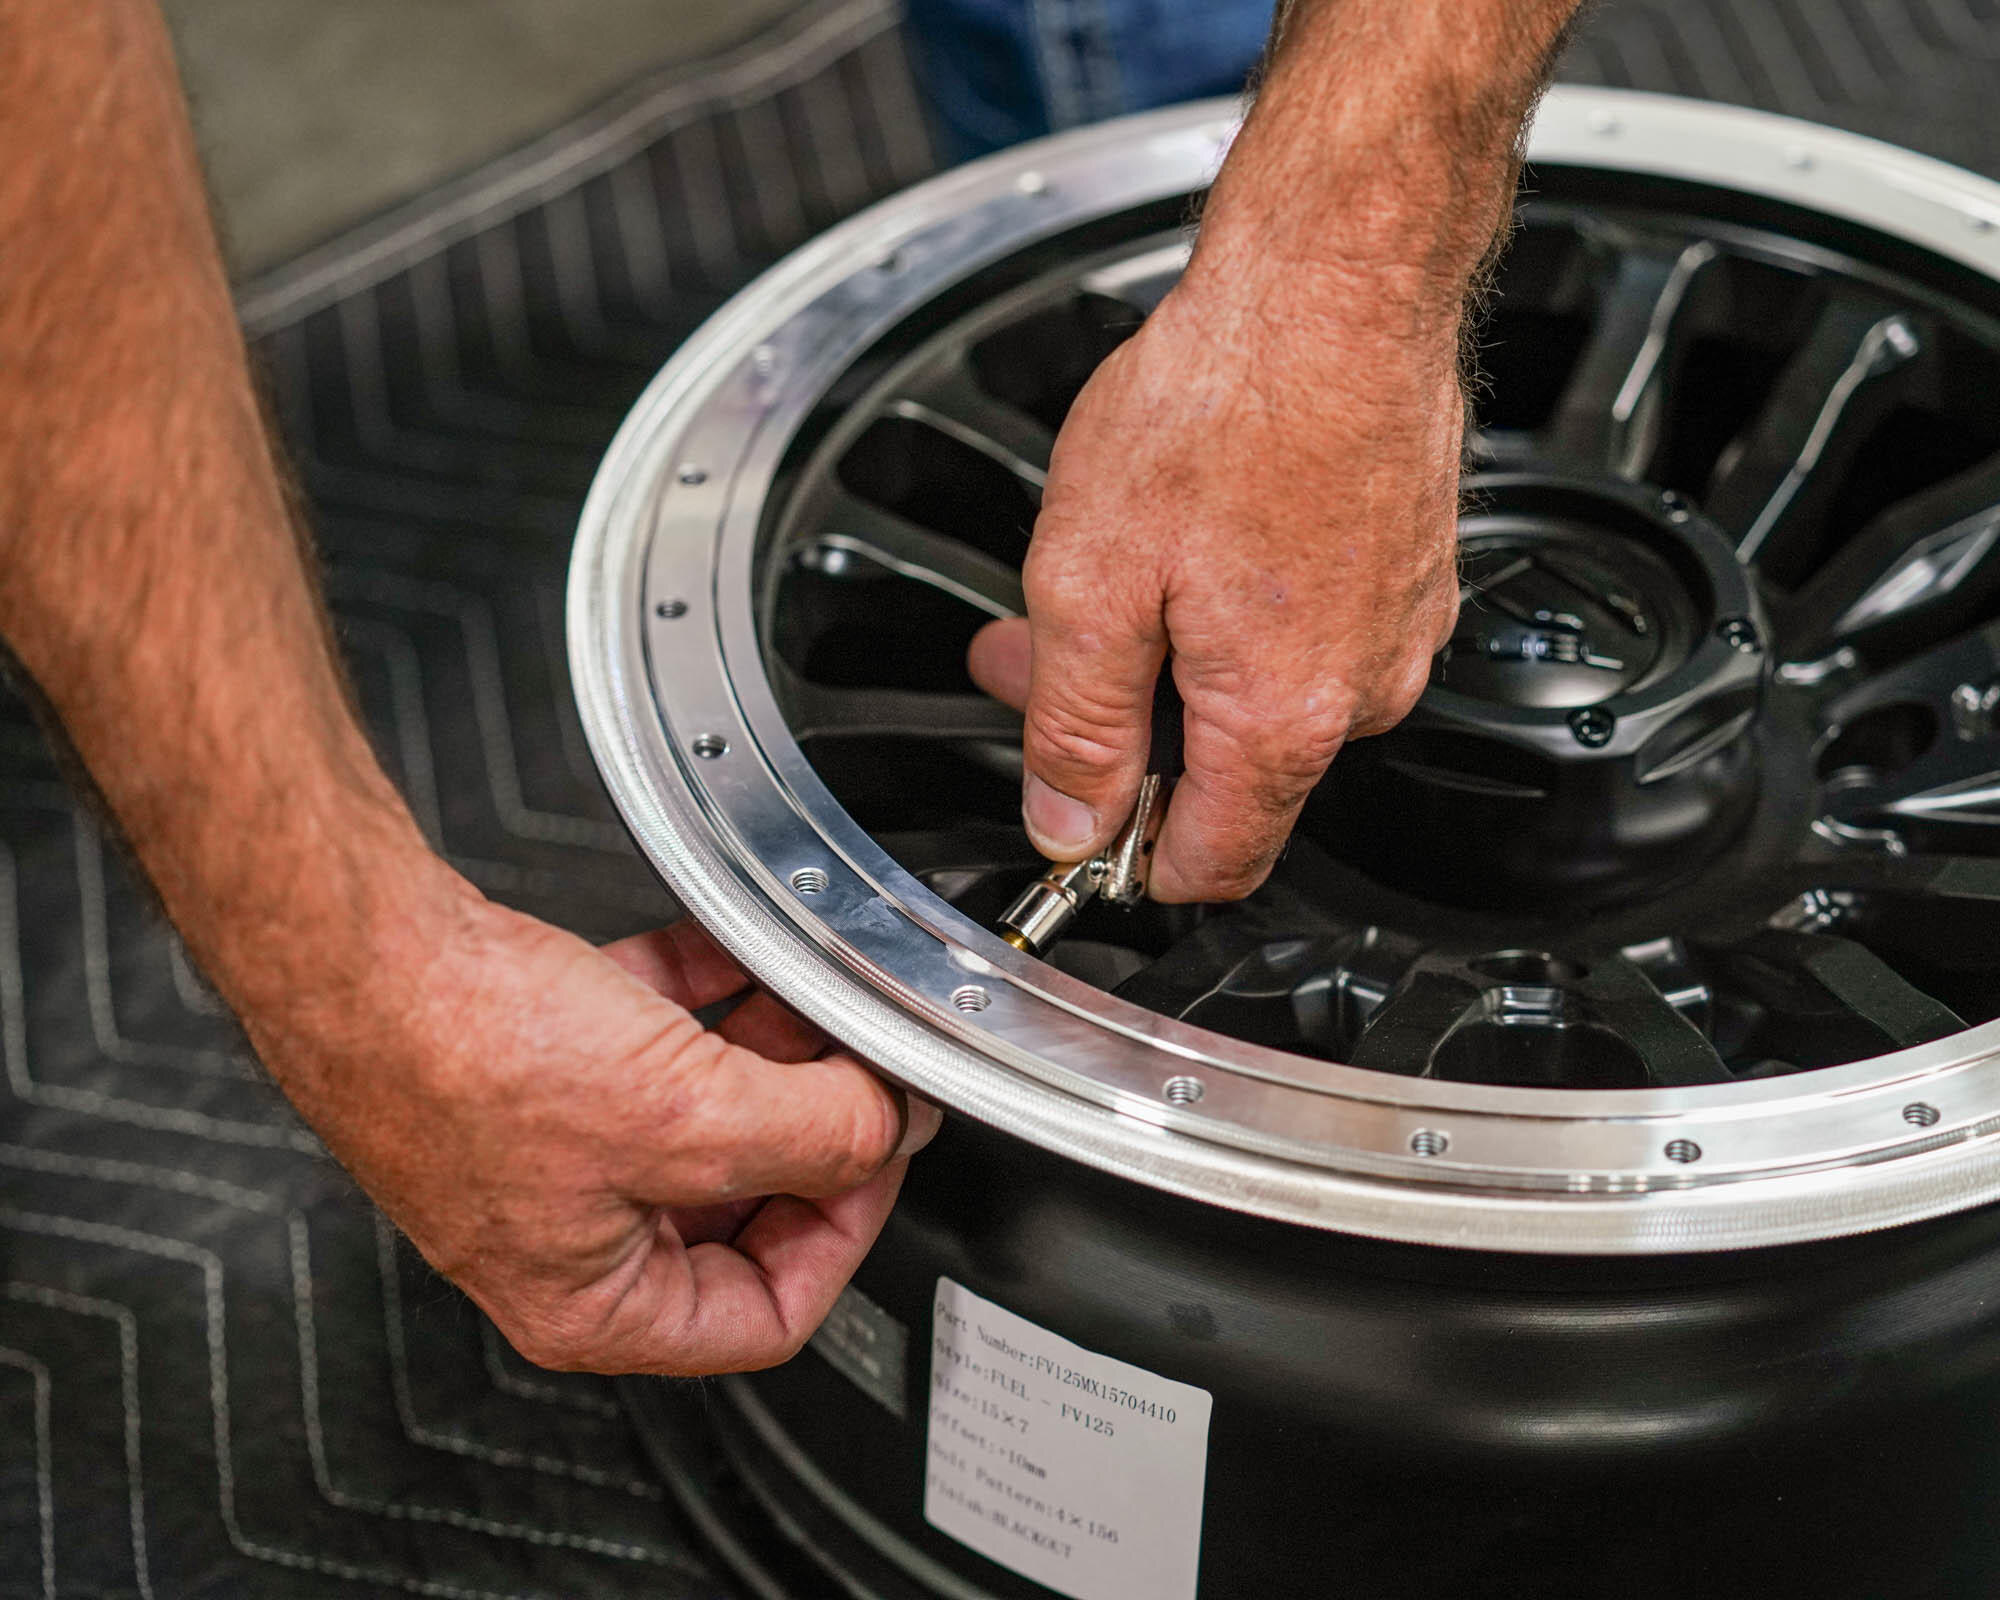
Using a valve stem tool, insert the valve stem into the valve stem hole on the wheel. Make sure it is centered and securely seated.
Step 5: Positioning the Wheel and Tire:
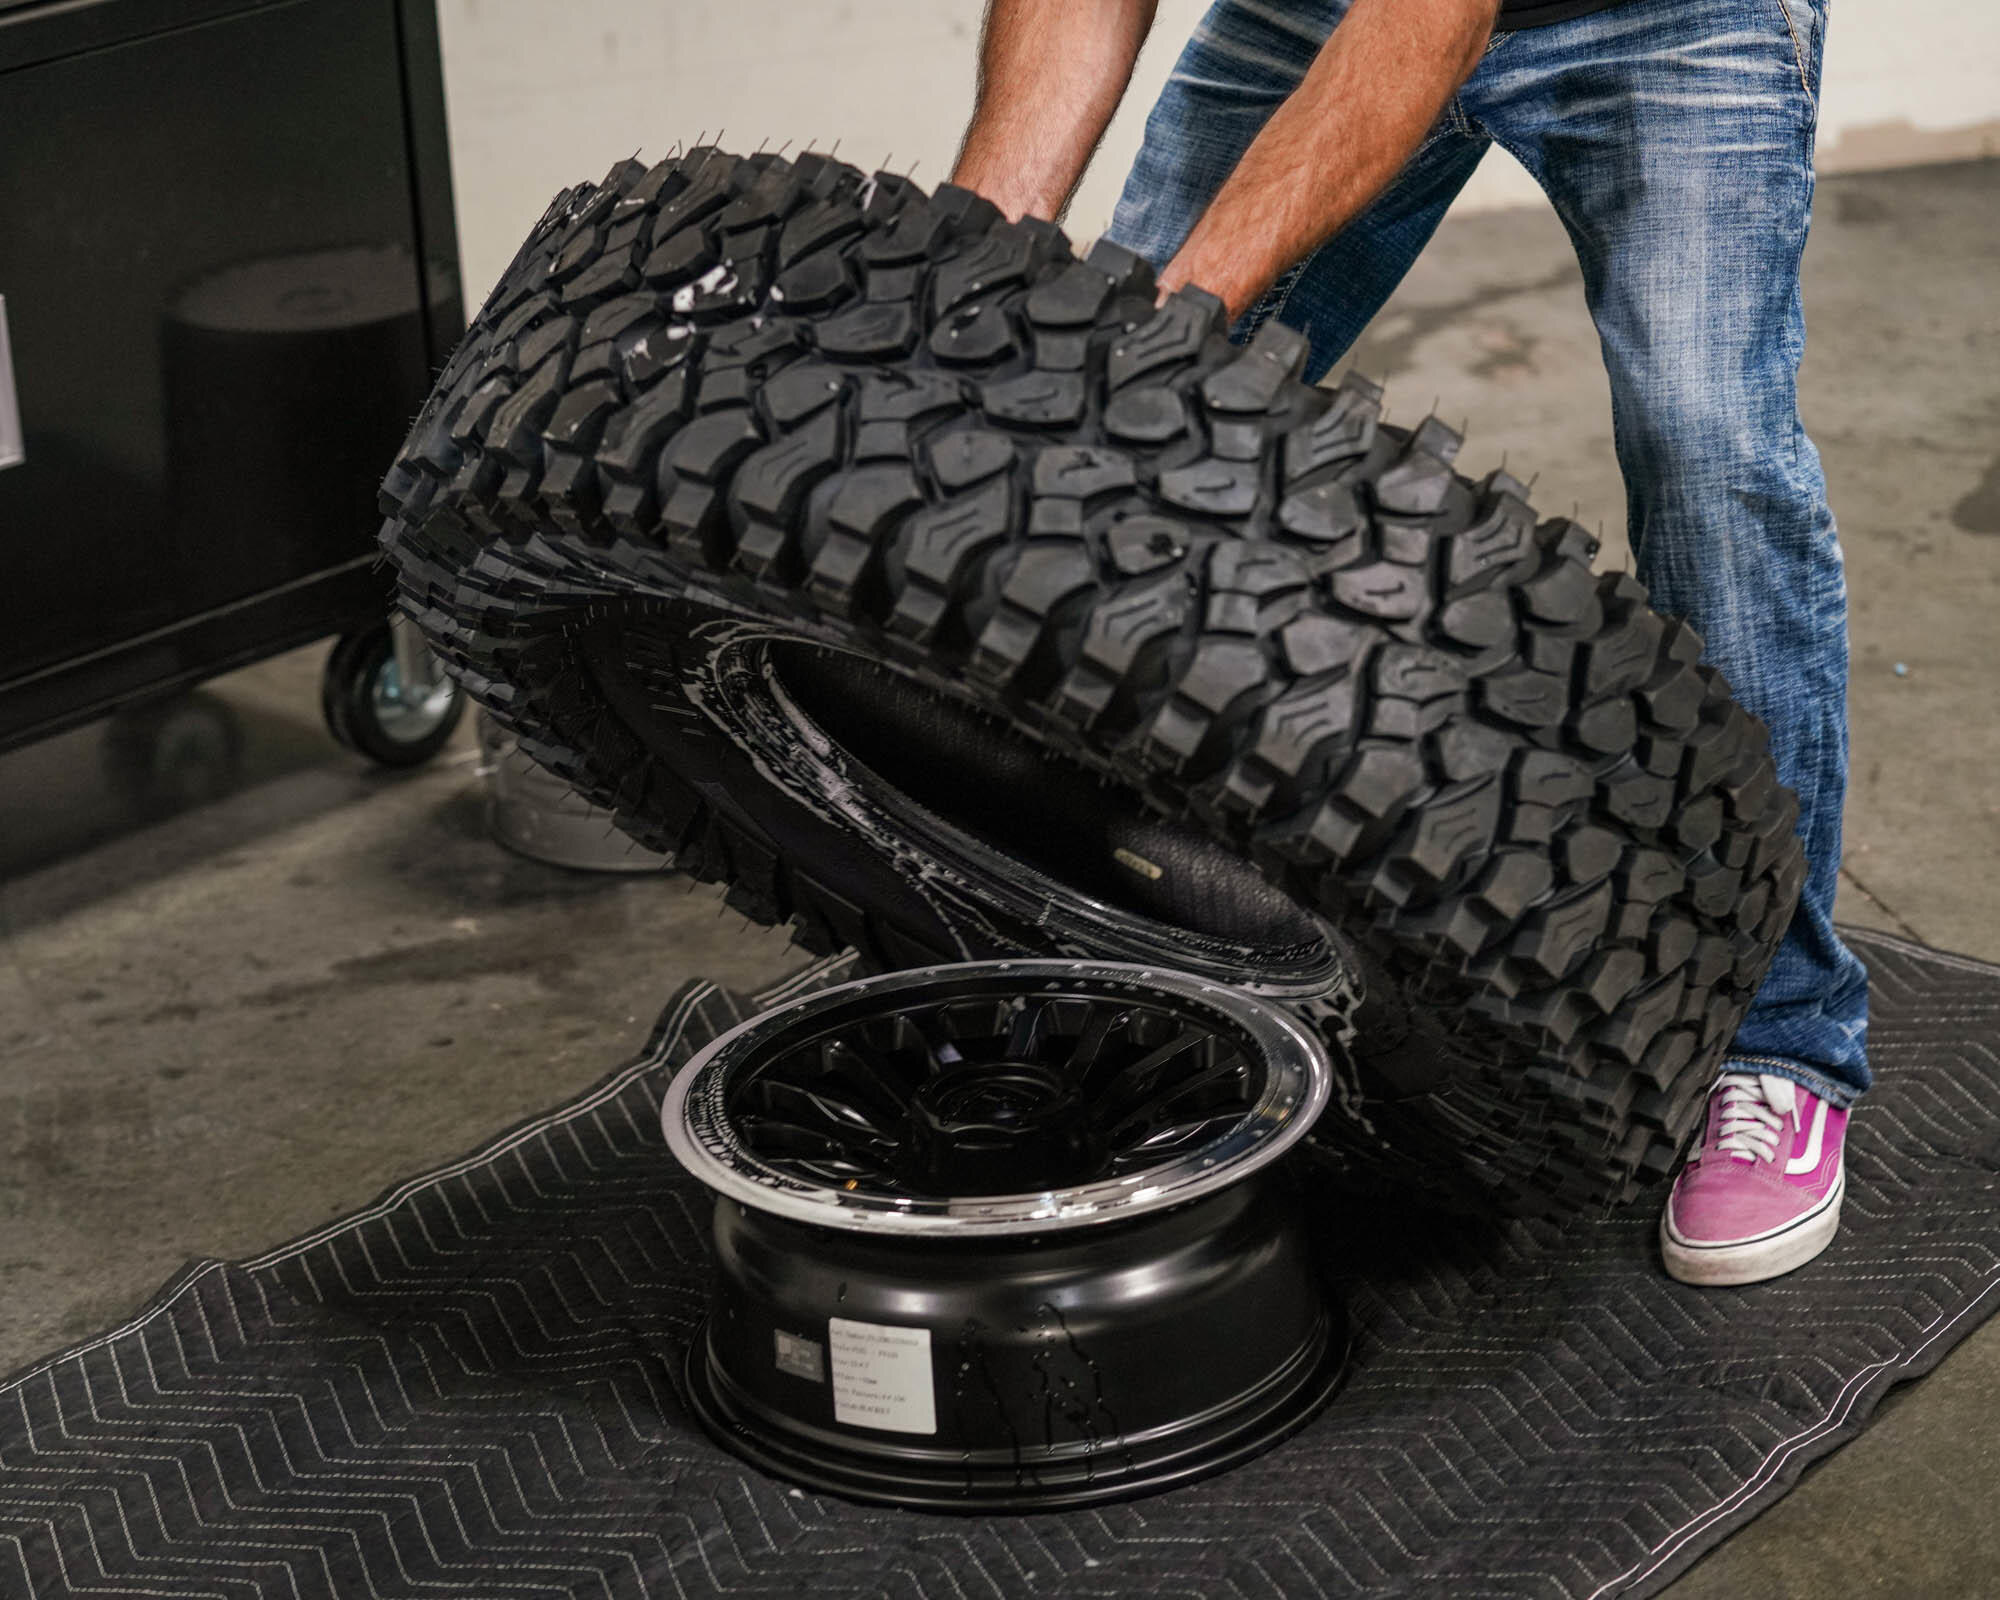
Place the beadlock wheel on a flat and level surface to secure it. Carefully align the tire with the wheel, ensuring that the valve stem hole in the wheel matches the valve stem location on the tire. Look for a yellow or red dot on the tire to identify the valve stem location.
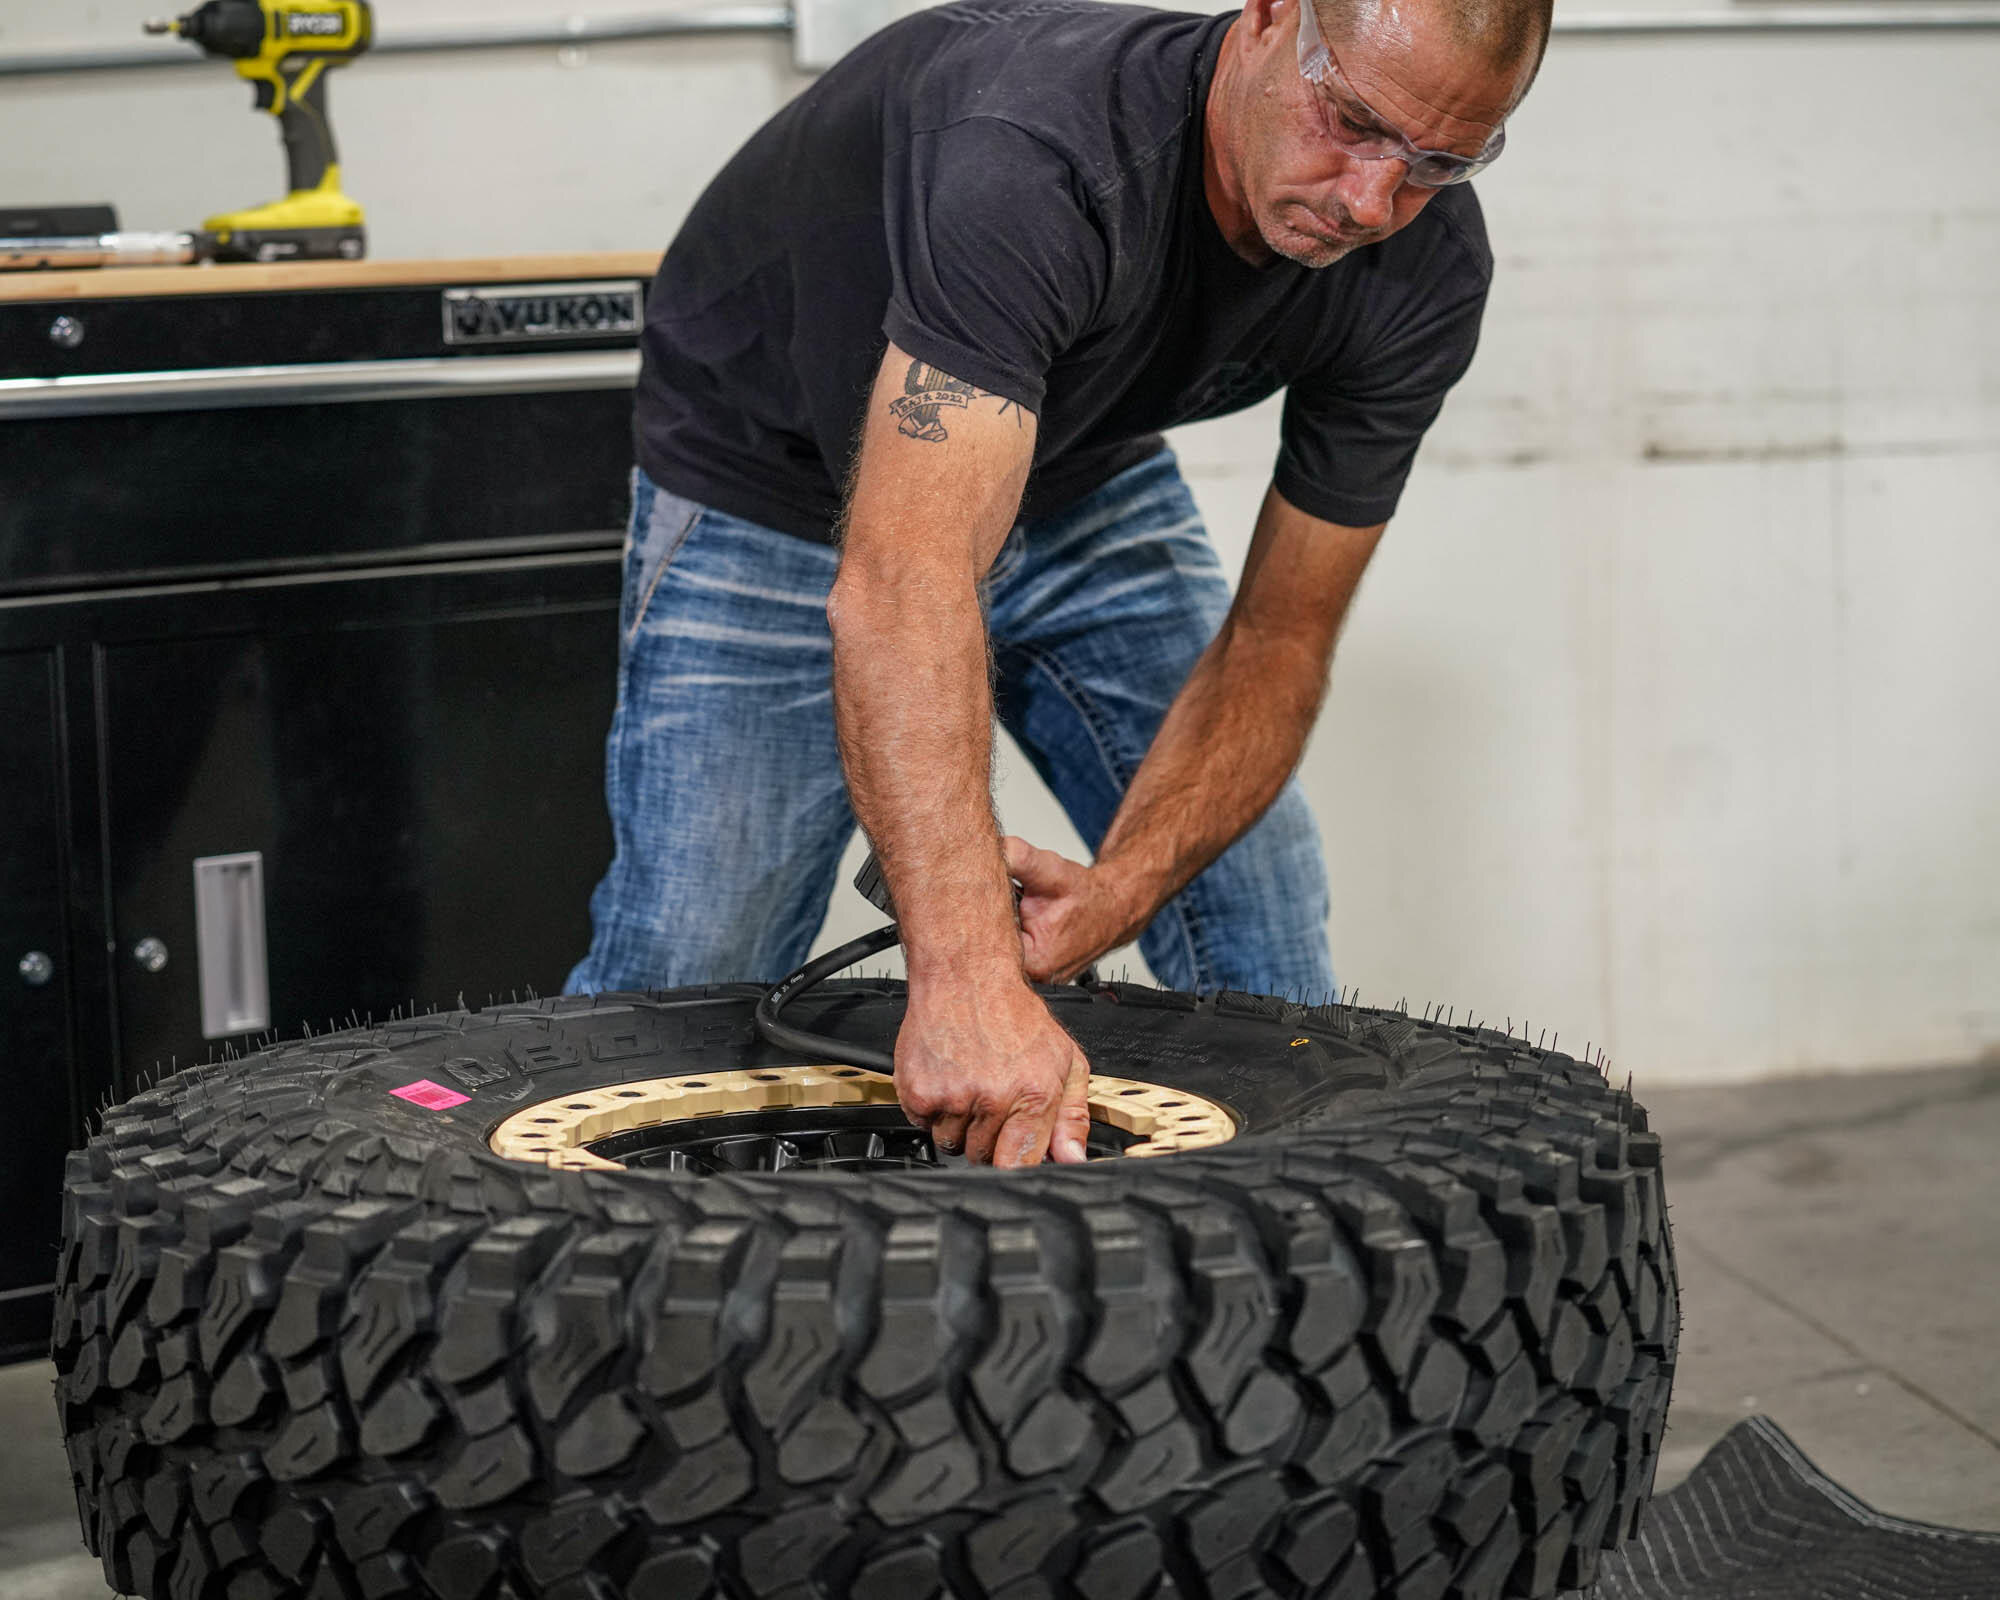
Step 6: Mounting the Bead (without a mounting machine):

Start by pushing one side of the tire onto the wheel, beginning from the opposite side of the valve stem. Gradually work your way around the wheel, pressing or walking on the tire left and right to help it fall over the wheel. Be cautious to avoid damaging the bead or wheel. Once the tire's first bead is over the wheel, this step is complete.
Step 7: Checking and Adjusting:

Place the wheel and tire on a sturdy 5-gallon bucket. This allows the weight of the tire to be pulled downward by gravity, aiding in aligning the upper lip of the tire into the groove of the beadlock ring. Spin the tire to align the red or yellow dot with the valve stem. Ensure that the lip of the tire is correctly seated into the beadlock wheel's machined groove, allowing the beadlock ring to sit flush and secure once tightened.
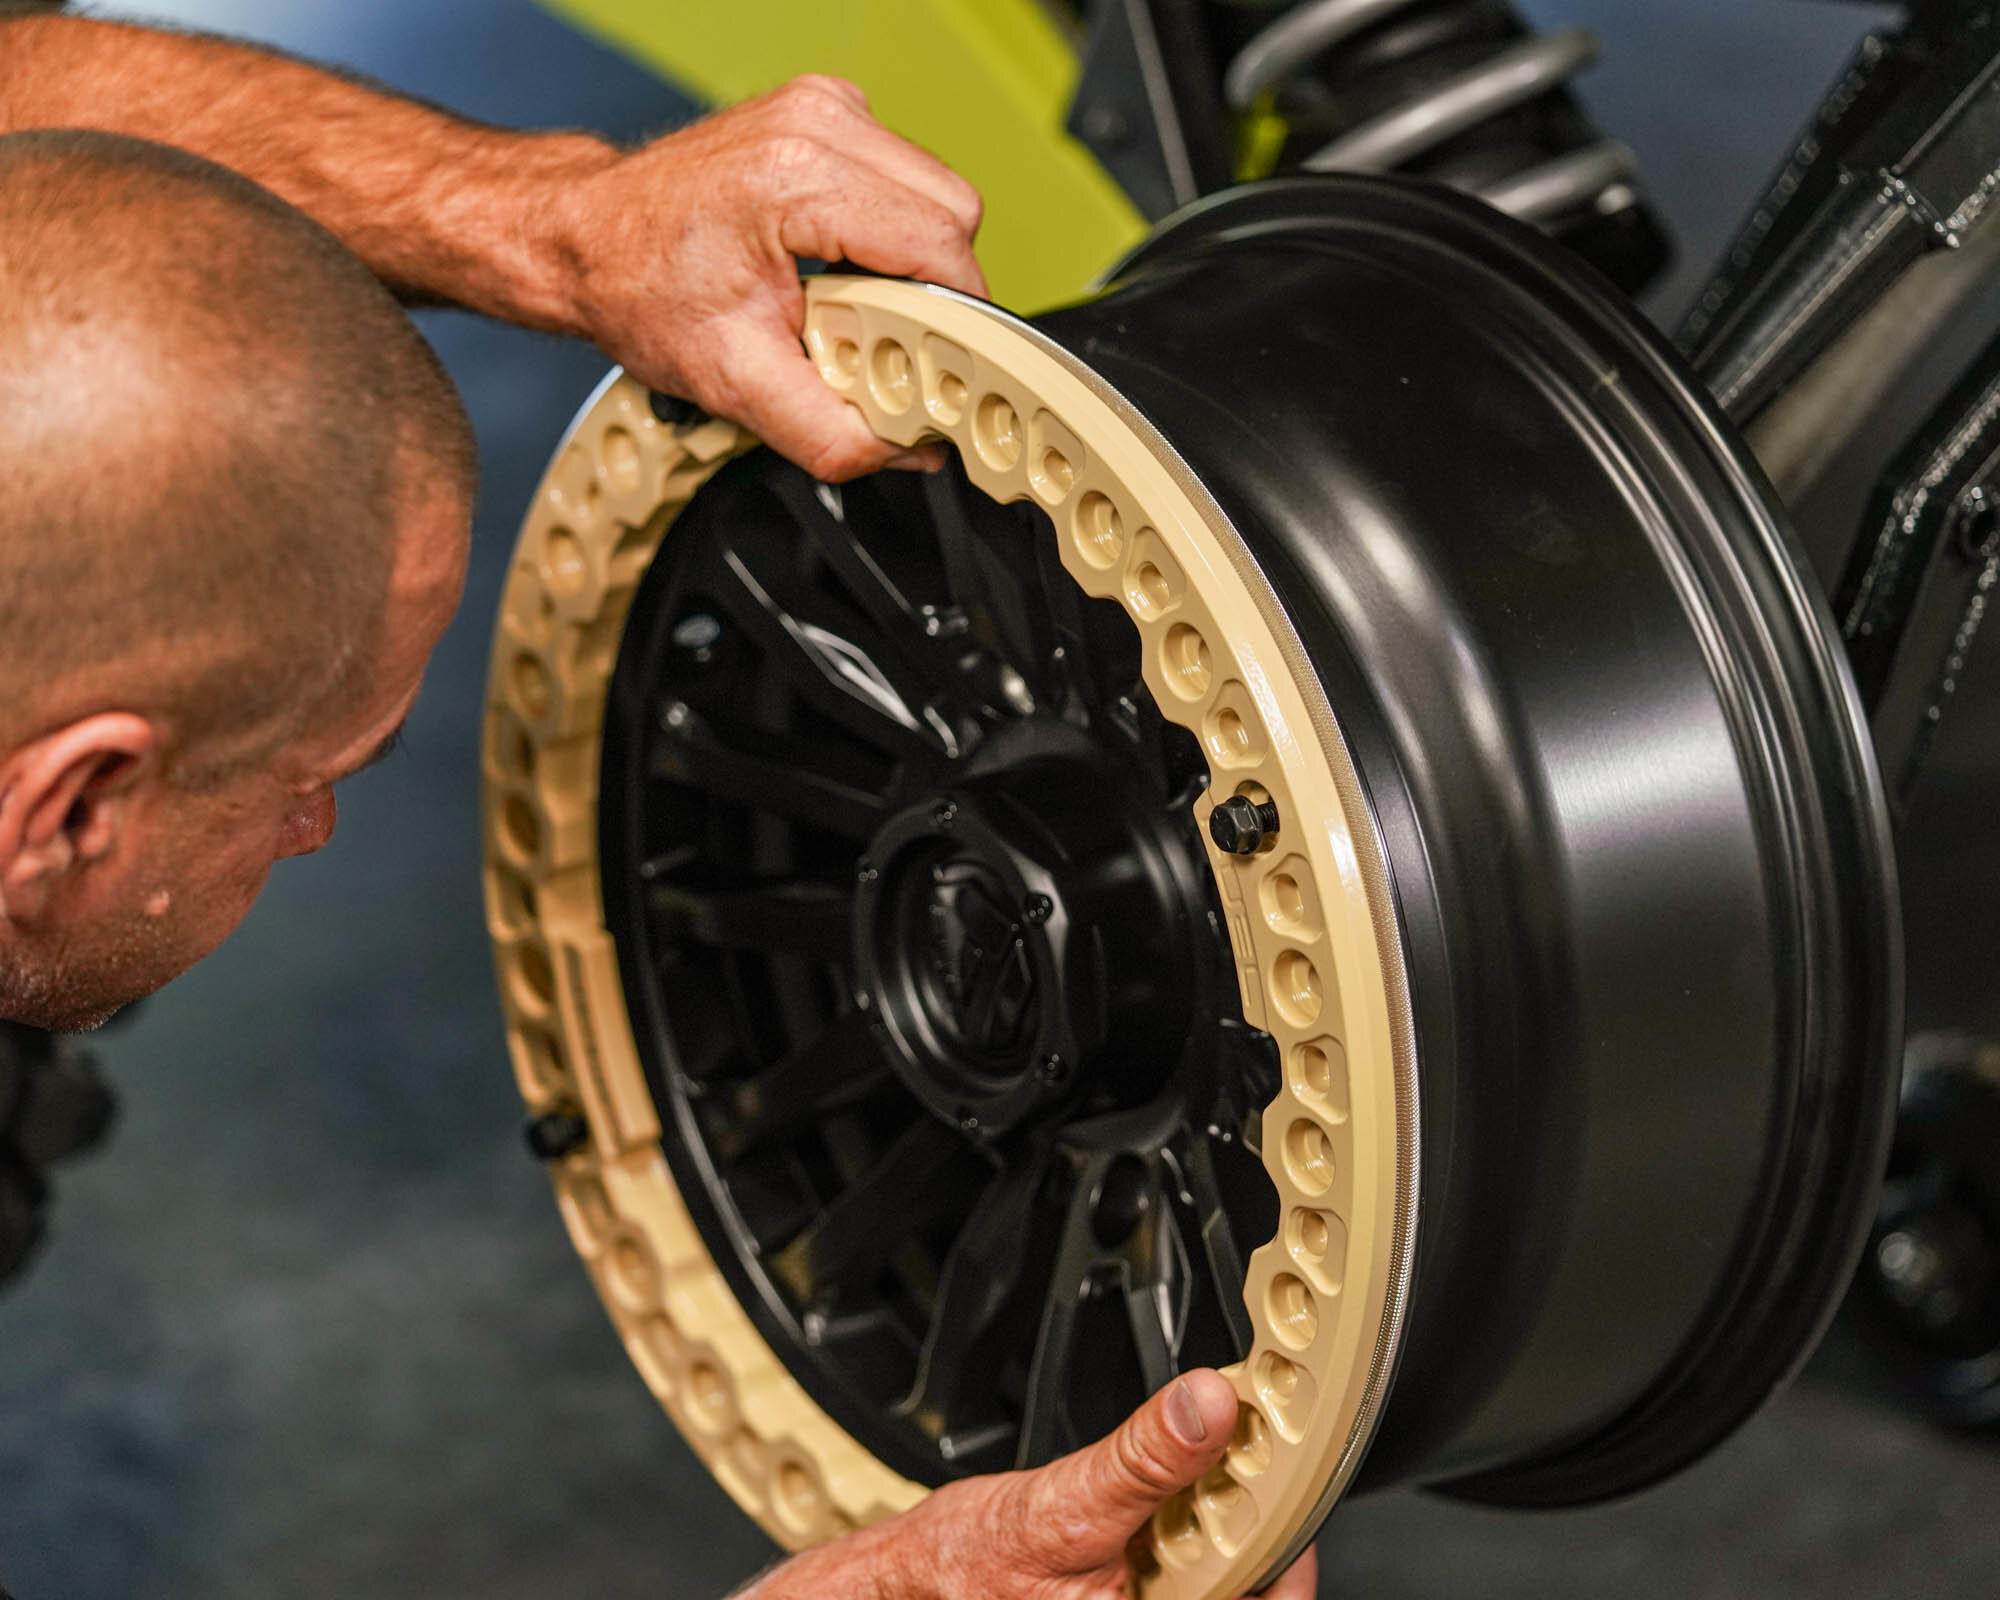
Step 8: Mounting the Beadlock Ring:

Set the beadlock ring on top of the tire and visually align the bolt holes (some rings may have a cutout for the valve stem that will need to be properly aligned). Using the provided hardware kit, loosely install four bolts by hand in a cross pattern. Once hand-tight, use a ratchet to tighten them about 2-3 turns each. Then, install the remaining hardware, tightening them by hand before using your tools. Next, in a crisscross pattern, use a low-torque impact gun to tighten all bolts evenly to about 12-14 ft-lbs. Next, with a torque wrench, tighten each bolt to 18 ft-lbs in a clockwise direction. On a second pass, torque all bolts to 19 ft-lbs again in a clockwise direction. (This is our general recommendation for many of the wheels we have worked with, always review what the manufacturer recommends and use the spec that you feel is best)
Step 9: Inflating the Tire (Setting the Bead):
Remove the tire and wheel from the 5-gallon bucket and place the wheel upright. Reapply lubricant or soapy water to the exposed inner lip of the wheel and the tire's lip. Set the tire back on the bucket in the same position. Using a compressed air source with at least 80-100 psi, inflate the tire. During inflation, the inner bead should set at about 18-20 psi (if lubricated). Listen for a slight pop, indicating that the bead has set. We recommend setting the tire pressure to 22 psi prior to mounting the tire. Once mounted on the UTV, we will then drop air pressure to our desired number pending the type of terrain we plan to drive on. Always monitor the seating and alignment of the tire throughout the inflation or deflation process. If any issues arise, deflate the tire and adjust accordingly before re-inflating.
Step 10: Final Checks:
Once all the steps have been completed, go around the wheel once more to ensure the tire is evenly seated and properly aligned. Perform a visual inspection to ensure everything looks good and checks out. After you have about 20-30 miles on the wheels it is recommended to re-torque all bolts to the 19 ft-lbs (or the recommended manufacturers spec)
Mounting a tire on a beadlock wheel for your UTV may initially seem challenging, but with the right tools, materials, and careful attention to detail, it can be accomplished successfully. This guide has provided you with step-by-step instructions to mount your UTV's tire on a beadlock wheel. Remember to prioritize safety, take your time, and seek professional assistance if needed. Now, you can confidently enjoy your off-road adventures with securely mounted tires. Happy trails!
Shop UTV Beadlock Wheels Here at UTV Source!


